Colored pencils are a popular choice for adult coloring fans due to their reasonable price points, a wide variety of tints and shades, and they are fine tips, which are ideal for coloring in the intricate details of adult coloring books. Exploring techniques like shading is a great way to add depth and dimension to your artwork. Yet shading with colored pencils can present a challenge due to their waxy substance, making it harder to blend colors. What is the best way to shade with colored pencils?
Before you begin, make sure your colored pencils are as sharp as possible. Consider using an electric sharpener to get them as pointy and uniform as possible. If you prefer the analog style, hold your pencil steady while twisting the sharpener around it, rather than spinning your pencil around in the static sharpener. A sharper pencil tip will yield brighter colors, as more of the pigment will transfer to the paper and a sharper tip can fit into all of the page’s nooks and crannies.
Use a light touch when applying the colored pencil to the paper. Make sure there is plenty of space between the coloring page and your hand. Hold your pencil at an angle so as much of the tip is touching the paper as possible. Lightly lay down a base of color, leaving some white spaces in the paper – take your time filling in all of the space. Gradually add additional layers, whether with the same colored pencil or blending in different tints and shades. Add a little bit of color with every layer, gradually working darker as desired.
Colored pencils are quite different from the #2 variety you may have used in school. Rather than graphite, they are made from either a wax or oil-based core in addition to pigments and binders. Softer, waxy cores tend to produce the most vibrant, even colors. Keep in mind that it is much harder to erase colored pencils than their graphite counterparts, so it is better to always start as light as possible; it is easier to add additional layers than it is to take away pigment. Blotting (as opposed to rough rubbing) at unwanted lines may help lighten them, but it is unlikely that you will remove the pigment entirely. Since colored pencils have a waxy substance, you can also try blotting them with a bit of putty. Instead of erasing the color, the putty lifts away a layer of wax-based pigment.
Using a Blending Tool with Colored Pencils

Try using a very light or colorless blending tool. These little stumps, made of tightly wound paper, will help smooth out the lines in your pencil strokes. You can also use them to blend different colors or soften the look of your piece in general.
If you do not have a blender, several household items will work just as well. Paper towels, tissues or toilet paper, and cotton balls or swabs can all serve as a blending tool. The object’s texture will determine the effect it has on your drawing. For instance, the smoother side of a paper towel will work well on lighter colors, while the more textured side will give you a rougher finish.
You can also try wet blending. If your paper is saturated with enough pigment, you can try gently pushing it around with a small amount of baby oil or even rubbing alcohol. Use a paintbrush or cotton swab that is just slightly moist with the solvent of your choice, and blend your colors as if you were painting. Just be careful not to get your page too wet, as that could cause it to pucker or tear.
A colorless (ie: pigment-less) blender can also create a nice effect, as can a white colored pencil or just a lighter tint of the same color. Play around with different shading methods to find what best suits your tastes, and don’t be afraid to get creative with your tools.
How to Blend Two Different Colored Pencils
If blending more than one color, it helps to start with the lightest variety, layering additional colors and increasing in darkness. Take care not to use too heavy of a hand; if you press down as hard as possible on your first layer, you may find it hard to add more, due to the waxy texture.
A fun way to practice this technique is by shading two contrasting colors into each other, such as blue and orange or yellow and purple. Choose one color and shade left to right, starting darker at the left and growing lighter as you move right. Then shade right to left with the second color, using the same technique while working darker to lighter. Try to blend the two colors until they meet in the middle.
Cross-hatching is another good way to blend two different colors; try using one color for horizontal lines, and another for vertical lines. Also try experimenting with stippling, a great way to create texture by making small dots with your colored pencil. You can vary how big the dots are and how close together they are to show an object’s dimensions.
Creating Shadows with Colored Pencils
Get creative with your shadows when coloring with colored pencils; there is no need to limit yourself to black, white, or gray when playing with light and shade. Try a warmer tone like pale gold or soft yellow to give your illustration the feel of golden hour. Cooler tones like dark blue, purple, and teal give darker scenes a hint of intrigue.
Areas closest to your light source (whether it is the sun, a lamp, or any other luminescent object you can imagine) should be brightest and gradually get darker as you move farther away.
Check out more colored pencil tips HERE!
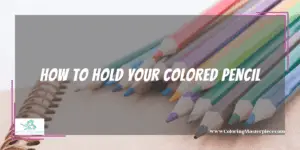
How to Hold Your Colored Pencil
Your instinct when coloring may be to move your pencil back and forth in straight lines, as this is typically how children are taught to color. Yet this may leave your artwork looking streaky and uneven. Try mixing up your lines, such as coloring in little circles, as this will give you a more even color. You can also try cross-hatching to vary the texture; color your first layer from top to bottom, and then the second from side to side, continuing to alternate your direction with each new layer.
You can also vary the pressure with which you hold your colored pencils. We have advised using a light touch-up to this point, and for most of your coloring time, you should try to avoid using too much pressure as it can tear your paper and lead to hand cramps. However, applying it selectively can add dimension to your artwork. Don’t use so much pressure that it breaks your pencil tip or hurts your hand, but practice making gradient shades by beginning to color as lightly as possible and gradually adding pressure.
Whichever techniques you choose to deploy in your illustration, be sure to take your time; give yourself space and time to focus on your art. Remember that coloring is about enjoying the process. Move your hand slowly and deliberately while focusing on your coloring page, and be deliberate with your coloring choices.
In addition to encouraging mindfulness, taking it slowly will help you to stay inside the lines – if that is what you’re going for. Don’t be afraid to make and break your own rules! Adult coloring is a safe and controlled space where artists of all levels should feel free to explore and express their creativity.
Frequently Asked Questions
What type of paper is best to use with colored pencils?
The best paper to use with colored pencils is a bit thicker stock with some teeth (or texture) to it. A thicker paper can hold more of the pigment, making your colors appear more vibrant. If you are blending or layering your colors, using thicker paper is of particular importance so your paper can handle the stress without tearing or puckering. Using properly sharpened pencils will also help make your colors more dynamic, as the pointy tips are better able to navigate and fill in the paper’s teeth.
What does it mean to burnish the paper?
When you burnish your coloring page, you color in all available space on the page. Essentially, you want to fill in all of the teeth with pigment. Once a paper is burnished it is difficult to add more layers of color; the colored pencil will give your whole sheet a smooth and waxy finish.
What kind of colored pencils are best?
Choosing a large palette with many hues allows you to truly play with color and technique. Having several different variations of the same basic color will allow you to shade and blend your art to your heart’s content. Try to avoid pencils with more binder than pigment, as these are less vibrant and harder to work with.
Maximize the benefits of coloring with my free adult coloring eBook and by signing up for my email newsletter HERE!
Disclaimer: The information provided by ColoringMasterpiece.com (“The Site”) is for general informational purposes only. All information on the Site is provided in good faith, however, we make no representation or warranty of any kind, express or implied, regarding the accuracy, adequacy, validity, reliability, availability, or completeness of any information on the Site. Under no circumstance shall we have any liability to you for any loss or damage of any kind incurred as a result of the use of the Site or Reliance on any information provided on the Site. Your use of the Site and your reliance on any information on the Site is solely at your own risk. This blog post is for educational purposes only and does not constitute legal advice. Please consult a legal expert to address your specific needs.
Terms and Conditions: https://coloringmasterpiece.com/terms-and-conditions/