Flower coloring books are a very common theme for adult coloring books. This is because flowers are beautiful and can be quite intricate if you want them to be. To color a flower well, you will be using layers of colors to create depth and beauty that you see reflected in nature. It is for sure a worthy challenge for any hobbyist. There are so many ways to color flowers; where you want the shadows is ultimately up to you, and flowers are all about shading.
When beginning to color a flower, some artists like to do an internet search for a picture of the flower in nature before they get started. This gives them an idea of where they could begin. It gives them an idea of the color scheme of the flower, how the veins of the flower may be, and how the flower petals flow. Just keep in mind when coloring flowers if you want to achieve realism, perfection is not what your aim should be. Nature is not perfect; it is imperfections that make nature compelling.
To color flowers with markers, you should:
- Organize your markers
- Start with outlining the petal
- Always keep in mind shadows will create depth and interest
- Finish filling out the flowers
- Tackle the center of the flower next
- Finish up any leaves and/or the stem
Steps to Successfully Color a Flower
Organize your markers
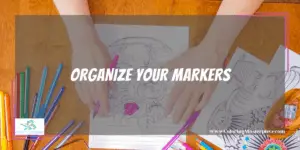
You need to know which color marker is that you are picking up. You don’t want to make the mistake of choosing the wrong color and messing up your coloring page. Using a dark spot that you wanted light or vice versa is an annoying slip-up.
Next, begin your focus on the petals of the flower
You can either hone in on one petal at a time or do large portions at once, keep in mind you don’t want to color an area so large that your ink dries before you can finish. You will not be able to blend your colors if the ink dries, and you will get lines on your flowers where you don’t want lines. Start out using a flicking motion, working on the dark shadowy parts of your flower first or the lighter parts. What you choose depends on what works for you; it just takes time to find your style.
The flicking motion is important to keep up when coloring your petals because this creates the texture of flowers. Giving them veins and this technique makes it easier for you to create a flower that is not flat. Try using the darkest shade on the bottom of the petal as a sort of outline, then towards the middle of that outline, form a point. This will give an illusion of a fold in the petal where it is being pulled towards the stamen.
Always keep in mind shadows will create depth and interest
Coloring flowers is all about the shading; the gradation between colors is what makes the petals look natural. Take your time to create layers of colors, and you will get a beautiful petal as a result.
Learn more about coloring flowers HERE.
Finish filling out the flowers and complete any white sections that you are not happy with
If you leave a little bit of white, that is fine. A bit of white left on a flower looks good. The lighter the shading on a flower, the closer that portion appears to you; the darker points are the parts of the petal that are folding away. You will need to determine where the highest point of the petal is and where the light is hitting your petal to do the shading effectively.
Tackle the center of the flower next

There is a texture-adding technique that involves making swirls with your marker. The swirls imitate the look the center flowers naturally have and create another layer of interest for your flower. You can create shadows using this method too, simply group the loops when you want the area to be darker and loosen the loops when you want a lighter-colored area.
You can use this same looping motion at the end with a white gel pen. This will give the flower a look of stamens if they are not stamens already. If there are stamens on your flower, try filling those circles in with the white gel pen. This touch of white will give your flowers a fairy-like look. Also, because the stamens are usually the highest point on the flower, coloring them white will make them appear to be coming towards you. When you are coloring the center of the flower, you will feel a need for hyper-realism, which is not necessary; if you do these finishing touches with white, you will get a great result.
Finish up any leaves and/or the stem
Of course, some flower drawings will not include a stem or many leaves. However, if there is a stem on your flower, this feature can be colored with a set of totally separate colors; it does not have to be the same color as any leaves you colored and can be quite light. The same thing applies to the steam as to the petals; shadows are where the depth lies. Create a sense of depth with the stem, but if you want to keep the focus mostly on the flower itself, not as much work is required here; subtle is better. If you do have any leaves to fill out, once again, continue the flicking technique. The leaves can be the same color as the stem, or they can be darker than the stem.
Keep in mind while you color your flower, going a little out of the line isn’t going to ruin your piece. Going out of the lines is usually harmless, and sometimes this bit of imperfection is a great way to continue to add depth to your flower. Also, you are probably taking up the hobby of coloring to relieve stress, not to create more worry for yourself. Instead of worrying about any mistakes you make while coloring, continue; once the flower is finished, you may find a new appreciation for those imperfections. Also, if you find yourself disappointed in your piece, take a step back and come back to the flower later. When you take a second look, you will probably find that you are too hard on yourself.
The flowers you color are something that you can cut out and use for Mother’s Day cards and even frame if you like the job you did.
Coloring flowers can be very intimidating because once you take your first look at them, they appear to require a lot of thought and intricate transitions. However, if you apply the techniques, I listed above and perhaps even take a look at the sources of this article, you will find that success is not hard to achieve in your coloring. Using lines for coloring petals will help you control your marker strokes and will give the flower a natural texture. Also, using a circling motion to color in the center of the flower adds another layer of interest. In the end, you will find yourself enjoying coloring flowers, and you will have a result that looks great.
Frequently Asked Questions
Should the stem of the flower match the leaves?
As I mentioned before in the article, matching the leaves and the stem is not a requirement. When coloring a flower, you may be tempted to match the two exactly, but if you look into the purpose of the stem, you will find that they serve the flower in different ways. Leaves are meant to absorb chlorophyll, which is green, so if stems function differently, wouldn’t they be a different color? The stems are usually a lighter color than the leaves of a flower in nature. So I would recommend using a lighter green on the stem and maybe even upping your shading game by blending in a yellow and/or even a white marker.
Do you need to use expensive markers to get a great-looking flower?
Not necessarily you can get a great-looking flower with as little as three markers. So if you are just getting started, coloring flowers can be very doable and can be cheap. You can use a few Copic markers if you want, or a variety of cheap markers would work just fine too. The look of your flower can be effective with markers you have lying around your house.
Should you hold the paper still while coloring in the flowers?
One thing a lot of professionals do is move their papers around. They move the paper to accommodate their hand instead of struggling to find the best position for coloring the flower. Because flowers are composed of petals circling one central point, move the paper to the best spot for each petal, and you will find your coloring experience will improve.
Maximize the benefits of coloring with my free adult coloring eBook and by signing up for my email newsletter HERE!
Disclaimer: The information provided by ColoringMasterpiece.com (“The Site”) is for general informational purposes only. All information on the Site is provided in good faith, however, we make no representation or warranty of any kind, express or implied, regarding the accuracy, adequacy, validity, reliability, availability, or completeness of any information on the Site. Under no circumstance shall we have any liability to you for any loss or damage of any kind incurred as a result of the use of the Site or Reliance on any information provided on the Site. Your use of the Site and your reliance on any information on the Site is solely at your own risk. This blog post is for educational purposes only and does not constitute legal advice. Please consult a legal expert to address your specific needs.
Terms and Conditions: https://coloringmasterpiece.com/terms-and-conditions/
