If you are just starting, and perfecting your coloring technique takes time, make sure to keep your sessions light and fun. It’s understandable to want results right away; however, this is a hobby meant to help you relax. So, sit back, grab a snack, and enjoy exploring this artistic medium. To begin our exploration, there are a lot of tools you can use to color; you can use pens, markers, pencils, and paints; it’s totally up to you. In this article, I will be reviewing techniques for coloring using the two most common coloring utensils; colored pencils and markers.
Time is what coloring takes to learn these techniques, and through time you will find your way of doing things as well. Applying the following techniques will take you a long way in achieving the look you want with minimal stress. We will go over the basics, like your grip, how to color, and choosing a tool. One other tool I want to point out before we begin is your coloring book. There are so many options out there keep in mind the quality of your paper is important; you don’t want to rip pages, especially when you are using markers to color.
The main types of coloring techniques are:
- Pencil techniques
- Gripping your pencils
- Coloring in strokes
- Keep your pencils sharp
- Marker techniques
- Hunting for markers
- Water-based vs. alcohol-based
- Shading with markers
Pencil Techniques
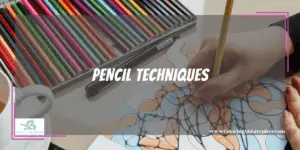
Get started with colored pencils you may have lying around, or start exploring some of your options. Do you want something that has a tougher core that won’t break as easily? Or are you looking for a softer core that has more color vibrancy? Both are important questions to get you started on your colored pencil quest.
Gripping your pencils
Let’s begin with how you hold your pencil/ coloring utensil; I say this because grip techniques can also be applied to markers. Comfort is key. There should be space between your fingers and pencil tip; try to keep your grip light, although you may be tempted to tighten your grip as your coloring time extends. By maintaining a comfortable and consistent grip, you will prevent hand cramps. Also, when you grip at the end of the coloring utensil color in a wider arch.
Coloring in strokes
When it comes to coloring with a pencil, you want to hide the strokes; by hiding the strokes, you are directing a viewer’s attention to your color usage, not the inconstant lines. If you use a beginner coloring technique and large back-and-forth strokes, your result can look patchy. Coloring in one direction is especially problematic when two sections meet; that’s when the directions you were coloring stand out the most. Try instead changing directions while coloring in small strokes; your coloring page will come out refined. Also, there is another method you can use try coloring in small circles to keep the colors even.
Cross Hatching is another popular method of coloring that solves the problem of a coloring page filled with patchy sections of line that stand out. This method is achieved easily. Simply color in one direction as any beginner would and merely go over it again in the direction that creates a crosshatch pattern. It keeps your work consistent, but this method is difficult if you want a 3-D effect.
Keep your pencils sharp
A sharp pencil is the best way to be exact in your color placement. Not only can you get into all the nooks and crannies with a sharp pencil, but you also get fuller pigments in your coloring sections. Keep in mind to always use a manual sharpener with colored pencils. Colored pencils are easy to over-sharpen, and you end up wasting lead, which is costly. Also, the lead in colored pencils is softer than graphite writing pencils, and they can clog up an electric pencil sharpener.
However, if you must use an electric sharpener, run a regular graphite writing pencil through it regularly to keep the blades clean. And please always be mindful of over-sharpening.
Check out more marker tips HERE.
Sharpening Tips
While sharpening your pencil, hold your pencil point upwards to get the best results. Also, when sharpening your pencils try not to apply too much pressure. If the shavings are small and in pieces, your pencil sharpener’s blade is dull. If you can, try replacing the blade; if you can’t, try tightening the screw on it. If that doesn’t help, it’s time for a new pencil sharpener. You can also use a knife to sharpen your pencils or sandpaper blocks.
Most of those who color as hobbits use colored pencils. This is because they are, more often than not, the cheaper option. Colored pencils last for a while, and they are easy to use. If you make a mistake, it is easier to amend. Markers are the second most common, mostly because of the rich colors they provide.
Hunting for markers
When looking for markers, the same thing applies here; you can always use what you have lying around. But some things to consider with markers is, are those markers alcohol-based? Probably, they are the most common. Alcohol-based markers tend to be the most vibrant but bleed through pages the most often and sometimes can have a strong smell.
Water-Based vs. Alcohol-Based
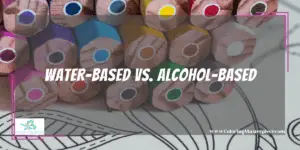
Water-based markers are not as vibrant as alcohol-based markers, but they are excellent for blending. You can draw a comparison between water-based markers and water-colored paintings. There are also different marker tips to choose from brush, chisel, and pointed. All markers have a purpose; the key is to find the marker set that works best for you.
Tip: Keep in mind if you are using a coloring book with double-sided pages, markers will tend to bleed. Suppose you have a double-sided coloring book and are looking for tools to color it with. Instead of buying markers, buy yourself a set of colored pencils to use. Later if you find you still want to try out markers too, buy another coloring book with single-sided pages, or print out some free designs from the internet and use the markers on those. Also, make sure to always put a piece of paper behind the page if you want to keep the page stain-free.
Shading with Markers
Using markers is different from coloring with pencils because you don’t need to hide lines. Of course, lines can be made with markers; this happens when you create a drastic color difference while shading an object. Shading is key with markers, just like colored pencils. When shading with markers, you can start with your darkest color outline the object you are coloring, and fill up the shadows gradually. If you take your time, you will be able to feel the shading; just keep in mind what direction you want the light to fall from.
When it comes to coloring, there are a lot of ways to do it, but the key is to find what works for you. To find what works for you, first, ask yourself, what do you want the results to be? Do you like the look of markers or pencils? Is crosshatching with colored pencils going to give you satisfaction? Keep trying things out until you find that sweet spot. But always keep in mind even though you may be aiming for perfection, at the end of the day, try to keep from stressing and enjoy it for what it is.
Frequently Asked Questions
Can you mix markers and colored pencils?
Yes, many artists blend both markers and colored pencils to get greater depth in their work. You can use markers for outlining and pencils for finer details. Some artists blend markers, colored pencils, and gel pens too. The added gel pen makes it easy for an artist to draw the viewer’s attention to a certain area.
Do all markers bleed through coloring book pages?
Not all markers bleed through paper. There are all kinds of markers. Usually, alcohol-based markers are more likely to bleed, but some are specifically developed to prevent bleeding. If you are concerned about bleed-through, do your research and find which markers work best for you. Also, as I said before in this article, put a piece of paper behind the coloring page, you are working on to keep the next one stain-free.
Do I have to spend a lot of money to make my coloring sheet look great?
No, time is key with coloring, just like anything else. You can always get started with cheap sets of markers and/or colored pencils and move up to more expensive tools when you learn more. Always try out the less expensive option before you invest in something you don’t love. The same applies to coloring books, the quality of paper is important, but if you end up not using it, the book is a waste of money.
Maximize the benefits of coloring with my free adult coloring eBook and by signing up for my email newsletter HERE!
Disclaimer: The information provided by ColoringMasterpiece.com (“The Site”) is for general informational purposes only. All information on the Site is provided in good faith, however, we make no representation or warranty of any kind, express or implied, regarding the accuracy, adequacy, validity, reliability, availability, or completeness of any information on the Site. Under no circumstance shall we have any liability to you for any loss or damage of any kind incurred as a result of the use of the Site or Reliance on any information provided on the Site. Your use of the Site and your reliance on any information on the Site is solely at your own risk. This blog post is for educational purposes only and does not constitute legal advice. Please consult a legal expert to address your specific needs.
Terms and Conditions: https://coloringmasterpiece.com/terms-and-conditions/