Digital artwork has received a lot of backlash in its history, but you have to admit that it creates a beautiful image. It isn’t always as easy to do as it looks, so the amount of time you take to work on your digital coloring skills can make or break this medium for you.
To improve digital coloring skills, you can break the process down into three key steps:
- Getting back to the basics
- Refining your techniques
- Changing up your tools
Make sure you go in this order when working on improving your digital coloring skills because each step builds on the previous one. There are plenty of inner workings for each step, so read through to learn specific ways you can improve your digital coloring skills.
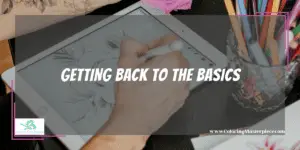
Getting Back to the Basics
Before you try to focus on techniques or tools to improve digital coloring skills, you need to make sure your basic skills are up to par. There are many ways to do this, but at the very least, you need to:
- Define the basic skills you need to master
- Get in touch with your inner child
- Learn how to create a base for digital coloring
- Learn how to pick colors in a digital setting
- Understand how to study subject pieces
- Understand values in digital art
- A lot of these are basics of traditional coloring, but they have a different approach when working in a digital setting.
Basics to Master in Digital Coloring
With digital coloring, it is best to start small. Before you move on to anything big, you need to ensure that you have all the basics covered. Typically this involves things like shapes and how you can put them together. Do not make the mistake of assuming you are above refreshing your skills. Digital coloring is different than traditional coloring, and you can save yourself a lot of time and stress by making sure your basic skills are sound. If you have issues, they can usually be traced back to a basic skill that did not translate well to digital.
Get in Touch with Your Inner Child
Take the pressure off to create top-tier artwork and go back to your roots. You will be surprised at what you can accomplish when you give yourself the chance to color without judgment. If you are facing a brain block, this can be as easy as putting technology away and taking a moment to color using a physical medium. Once you feel the block has passed, you can return to digital coloring. If this is not the issue, you should try digital coloring like you started with other coloring styles. Try to do things like color in line art or doodle on the screen. Working up your confidence will improve your coloring in ways that refining skills never will.
Clear Your Canvas
With physical coloring, you usually start on a light-colored canvas, and you have learned to build on top of this. It does not work the same with digital coloring. Instead, you want to start with a darker base color and then build lighter values on top of it. This way, you focus on how light interacts with the colors, not just the colors themselves. It narrows your focus just enough to make the entire process easier, especially when you get your color palette down.
How to Pick Colors
While digital art provides access to so many more colors, limiting your colors and building off a smaller palette is better. Contrary to what many believe, most objects tend to consist of two or three main colors with just a few others for details. Using too many colors makes the object look manufactured and inauthentic. Before you start coloring, design a color scheme that involves those three main colors along with their varying shades. Note any detailed colors that should be included. Try to avoid using the color selector tool. Choosing your colors is a great way to build your skills. If you find yourself struggling, you can make a color selector tool by cutting a small square in a bit of neutral-colored cardstock. This will help you section off specific colors, and eventually, you will be able to determine colors without it.
How to Study the Piece
Before you start on a piece, you should make sure you have the skills needed to complete it. Break it down into parts based on technique, and then test those out (even if you have mastered them in a physical medium). You may find out that you do not know how to color the mane of a lion or the eye of a horse, but it is better to discover that before putting effort into a large-scale piece. You can then take the time to work on these specific skills before going back to the complete image. Every piece is made up of different lighting, colors, shapes, forms, and textures. Make sure they are attainable before committing to the piece but do not be scared to work to get to that point.
Understanding Values
You might think it is easy to just start in grayscale and add colors, but this stunts the growth of your skills, and you end up losing a lot of value. You should understand that colors are made up of both brightness and value. Work to identify different values in the piece and how the color is affected by them. With digital art, it is easier to shift the value, but you need to know where you are going to use this correctly.
Refining Your Techniques
Most of the techniques you need to work with are covered in the basics section, but once you master them, you need to pay extra attention to digital-specific techniques. Most of your advanced issues can be addressed by using a larger brush or looking more closely at how light interacts with the piece.
Use a Larger Brush
You should practice with all the brushes available to you digitally, but larger brushes are especially useful for setting the base work when coloring. They let you start with little pressure, and you can keep color uniform in the layer. By starting with larger brushes and working down, you have a clearer idea of how the layers interact with each other. If there is an issue, it can be dealt with easily, even if you feel the need to delete a whole layer. Larger brushes set the foundation for smaller brushes to arrange details on top of.
Go Beyond a Directional Light Source
If you want your coloring to result in a more realistic image, you should realize that light does not hit from just one direction. It might have one source, but the light then bounces off other objects and surfaces in the illustration. To work on this ambient lighting, you should try shading the object before lights are even introduced. Try to imagine where light is bouncing off of and how that might affect the original hue of the object using subtle variations of shades. You can illuminate the object after, but if you set your base with varying shades, you might find you do not need as strong of a brighter presence.
Changing Up Your Tools

It is easy to get burnt out on one specific tool with digital coloring. You have plenty of colors and settings, but using one stylus the entire time can get boring. Opening yourself up to other tools increases your skills and adds a new variety to your work.
These tend to be limited to:
-
- Finger painting
- Using different styluses
- Reminiscing using a brush-style stylus
Even if you just alternate between a stylus and your fingers, you already have a whole new set of skills available to you.
Fingers
Finger painting is not very precise, but it helps with a few things. Since you already expect finger painting to be messy, there is less pressure on you for perfection. Fingers are great for smudging or playing around with different brushes. They also tie you back to the coloring roots of your childhood. This can help reset your brain to fresher ideas or a more laid-back approach to coloring.
Different Styluses
Different styluses can provide different effects. They touch the surface of the digital screen in different ways, and it is worth testing out different stylus types. If you are short on cash or not committed to using different styluses, then one with interchangeable tips can give quite a bang for your buck. The varying textures are useful for creating different effects in your work, and you may find you prefer one over another.
Brush-Style Styluses
Styluses that look like paintbrushes are great for resetting your brain or helping you shift from physical paint to digital coloring. They are easier on your coloring surface, and they have a smoother texture than typical styluses. Having a brush-style stylus is great just to keep on hand, but you just might fall in love.
Check out our favorite coloring apps HERE.
How to Test Out New Tools and Settings?
The most important thing to keep in mind when testing out new styluses, digital brushes, or techniques is that you need a safe space to do it. Do not dive headfirst into a passion project and expect everything to work out. You do not need to worry about wasting paper or ink, so give yourself space to doodle and test out the different tools you can use to accomplish your digital coloring goals.
Some specific things to focus on are:
-
- How “in control” do you feel of the tool, or how it responds
- How it interacts with other tools
- What limitations there are
- In specific instances, it might be applicable
- Any other tests you want to put the tool through
These work with both physical tools (like styluses or even coloring surfaces) and digital tools (such as settings or digital brushes).
Frequently Asked Questions
What are the benefits of digital coloring?
Digital coloring has many benefits, including its versatility and low cost. While you can spend a lot of money on specialized digital coloring tools, a lot of the time, you can do it using just a computer, phone, or tablet. There is little to no clean-up involved, and it is much easier to trace and process images.
Is digital coloring good for beginners?
Digital coloring is good for beginners. Because you can get started using the technology you already have, the low buy-in cost makes it attractive for those starting. It is also much easier to make corrections to digital art, resulting in less fatigue early on.
What are some options for digital coloring software?
Some of the most popular options for digital coloring software include Adobe Photoshop, Corel Painter, Procreate (for Apple products), Clip Studio Paint Pro, Artweaver, GIMP, and ArtRage.
Maximize the benefits of coloring with my free adult coloring eBook and by signing up for my email newsletter HERE!
Disclaimer: The information provided by ColoringMasterpiece.com (“The Site”) is for general informational purposes only. All information on the Site is provided in good faith, however, we make no representation or warranty of any kind, express or implied, regarding the accuracy, adequacy, validity, reliability, availability, or completeness of any information on the Site. Under no circumstance shall we have any liability to you for any loss or damage of any kind incurred as a result of the use of the Site or Reliance on any information provided on the Site. Your use of the Site and your reliance on any information on the Site is solely at your own risk. This blog post is for educational purposes only and does not constitute legal advice. Please consult a legal expert to address your specific needs.
Terms and Conditions: https://coloringmasterpiece.com/terms-and-conditions/
