Adult coloring is an activity that has been around for some time, but in the last decade or so, there’s been a huge explosion in its popularity. Walk into any bookstore or book section in a big box store and you’ll find a good variety of adult coloring books to choose from. Several of these books have even made it onto the New York Times Bestsellers List
Along with adult coloring books, you need adult coloring mediums and implements. Some of the most versatile kinds of tools for creating vibrant, textured, and interesting pictures are gel pens. You can do a lot of different things with gel pens, you just have to know how.
You’ll find that coloring with gel pens is something that can calm your mind. Research is showing there is a connection between adult coloring and a reduction in anxiety and stress levels. A study published by the Johns Hopkins News-Letter found that students who were given even a short art-making session proved to have less anxiety than those who weren’t afforded one before taking exams.
Making art with gel pens is something that anyone can enjoy regardless of age, gender, ethnicity, or income level. It’s soothing and satisfying, and there are so many varying effects you can get using these versatile tools.
A Quick Look at the History of Gel Pens
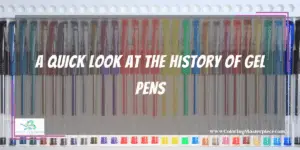
Before we get into how to use gel pens for your artwork, let’s look at where they came from and some general information about them.
First off, these are a special type of ballpoint pen. Rather than being filled with the traditional ink you can find in a regular ballpoint pen, they’re filled with a water-based gel that has pigment added to it and is thicker than ink.
The first gel pens were manufactured and sold in Japan back in the 1980s. There was a huge draw for these pens with architects, engineers, and graphic artists because they write smoothly with bold color from a tip that doesn’t easily wear down like other options. In the later part of that decade, Crayola got on board with gel pens and started producing their version aimed at children.
Today numerous companies manufacture and sell gel pens for all kinds of uses, some of which are for adult colorists. So now let’s look at how to use them.
1. Choosing the Right Color Scheme
One of the first things you should do before you start coloring your chosen picture is decide on a color scheme. You can make your artwork look however you want it to by choosing colors that change the look and feel of the picture. If you like, you can just choose colors as you go, but it’s fun to experiment with different kinds of color schemes that can make your picture more intricate with varying effects.
Here’s a look at color schemes you can try out in your gel pen art pieces.
-
-
- Warm colors – These elicit cozy, comfy, inviting feelings. They include your yellows, oranges, reds, and pinks.
-
-
-
- Cool colors – This group is calming and can elicit a peaceful mindset. They can evoke feelings of open expansiveness. These are your blues and greens.
-
-
-
- Complimentary colors – Looking at a color wheel with a rainbow of colors around it, complimentary colors will be found opposite each other on the wheel. For example: if you went with red and green or yellow and blue. You’ll get a lot of contrast in your pictures by choosing this type of scheme.
-
-
-
- Analogous colors – Still looking at the color wheel, these colors will be right next to each other on it. You could do red and orange, blue and green, or red and purple. The effect of this option would be more harmonious.
-
-
-
- Monochromatic colors – This is another option for getting a harmonious flow through your art. With this type of color scheme, you use different shades of the same color. You could use all different shades of blue, for instance.
-
-
-
- Triadic colors – These colors are ones you’ll find evenly spaced from one another on the color wheel. An example would be if you use green, purple, and yellow. You’ll have a lot of contrast that makes some areas pop. Your picture will look more vibrant.
-
2. Choosing the Right Gel Pens
Once you’ve decided on a color scheme, it’s time to pick out some gel pens. Just like other kinds of pens, you’ll be able to find different tip sizes. There are everything from ultra-fine tips to chunky tips that will produce bright, bold lines. You can color with any of them, it’s really up to what your preference is.
Some gel pens will be better for drawing than others, so if that’s what you intend to do with yours, then you’ll want to look for pens with gel that dries quickly. If you’re drawing something, you likely want things to look a bit more precise than what you get when you’re coloring. Some gels in these kinds of pens won’t dry quickly, leaving them more open to smudging—great for producing coloring effects, maybe not so great when you’re trying to add specific detail to a drawing.
Another feature you can look at is the grip on the pen. If you’re planning on coloring with gel pens, you may be holding your pens for long periods. Many people sit down for hours at a time to do their coloring. You can find pen grips that are designed to ergonomic standards that will offer you more comfort when you’re using them.
While there are numerous colors to choose from and different sizes of gel pen packages you can opt for, there are also varying kinds of gels. You can choose to use regular, metallic, neon, pastel, glitter, and white gel pens for your art. A combination of these will help you add depth to your pictures, too.
3. Adding Textures That Can Intensify Your End Product
You can get creative with your gel pens and create all kinds of different textured looks in your art. Gel pens are well-suited to adding texture because of how bold and vibrant the pigment is in the gel. Try some of these different techniques to give your picture more character and different looks.
-
-
-
- Stripes – You can draw these either vertically or horizontally. It’s up to you how you want to space them as well.
-
-
-
-
-
- Polka dots – These can be a lot of fun because you can do them in varying sizes, as well as in varying colors. You can also play around with the spacing of them too.
- Polka dots – These can be a lot of fun because you can do them in varying sizes, as well as in varying colors. You can also play around with the spacing of them too.
-
-
-
-
-
- Stippling – Like polka dots, stippling is coloring in with dots. With this technique, the dots are very small and you place them together so they present as a textured surface. Mixing in different colors and slightly different sizes or shapes of dots can sometimes make your picture look 3D.
-
-
-
-
-
- Swirls – You can draw swirls in many colors, one color, different sizes, and space them however you want to get variances in texture.
-
-
-
-
-
- Scribbling – It’s exactly as it sounds. You can scribble a lot or a little to get darker, bolder patches of color or some that aren’t as filled in. There aren’t any rules to follow, you can just experiment and find patterns you like that change the look of your picture.
-
-
-
-
-
- Geometric shapes – These can change the look of your picture because you can use any kind of geometric shape you want. You can layer them in different patterns, on top of each other, and in different sizes and colors for some intriguing effects.
-
-
-
-
-
- Hatching – This is drawing stripes parallel to each other in an evenly spaced manner.
-
-
-
-
-
- Crosshatching – You’ll draw the parallel stripes and then lay down perpendicular stripes on top of those.
-
-
One final example of a way to add texture with your gel pens to your pictures is to lay the page over some type of item that will produce an effect when colored over. Some examples of items you can try are a flour sifter, mesh, burlap, sandpaper, or leaves. Be creative and try whatever your imagination comes up with.
4. Mixing Art Mediums
Coloring with gel pens will make beautiful, vibrant pictures alone. However, you can experiment with mixing gel pens with other mediums, such as crayons or colored pencils. You can also use them with markers. We mentioned above what the different kinds of gel pens are that you can find. You can use various kinds of them in one picture to get all types of different looks. You can also mix colored gel pens with a white gel pen to get other shades of the color you have.
Something cool you can try with gel pens and colored pencils is to color in a section with a colored pencil, and then draw a gel line at an outer edge. You can then use a tool—a flat-ended paintbrush works well—and pull the wet gel over the pencil color. You’ll get a result that looks like watercolor.
Mixing gel pens and markers allows you to color in some sections with a solid, matte medium, the marker, and then contrast sections around it with gel pen techniques.
Mixing different art mediums will let you add more depth and character to any kind of picture you’re coloring. It allows you to be more creative and experimental.
5. Using Different Tools to Experiment with Blending
Above we mentioned using a flat-ended paintbrush to blend the gel pen into the pencil color. That’s one way you can do some blending. There are some other tools you can use to blend colors and different mediums when you’re coloring too.
The method with the paintbrush can be done with one that is either dry or you can wet it just a bit to make the blending go further. You’ll find that some gel pens have ga el that smudges easier than others so it just depends on your choice of pens.
Some of the other tools you can try are things that you may just already have around your house. The blending technique can be done with pencil erasers, silicone spatulas, thin bristled paintbrushes, or cotton swabs that have a flat end on one side. You can even do some of your blending with your fingers.
You can try out the blending technique on a test page. This will allow you to see how well your gel pens smear. Then you’ll know if you need to use water with them or not. You can figure out what the best tool is for you to get the blended effect that you’re looking for.
Be Creative
As you start to experiment with your gel pens, you’ll find all kinds of ways to use them to get the effects you want. The biggest thing is to just let your creative genius flow. We’ve given you tips and tricks for coloring with gel pens that you can use to produce beautifully crafted, interesting coloring pages, but the most important factor in doing that is you.
You can try all of these steps and then try anything else you think of. Gel pens give you the capability to make pictures that look unique and intriguing. Yes, there are some specific things you can do with them, but don’t limit yourself. Have fun with it and just create. You’ll find you can create your techniques and make your unique effects coloring with gel pens.
Final Thoughts
Gel pen coloring is a hobby that can benefit the mind, body, and soul of those who take it on. It allows for time to let go for a bit and focus on something different. Studies are showing that there is a link between coloring and the reduction of anxiety and stress. So, even if you’ve never tried any coloring before, trying it now could result in a new pastime for you.
The steps for coloring with gel pens we’ve laid out here aren’t for experts. While some of them were developed through expert guidance, these can be done by anyone. You can easily choose your own color scheme and gel pens. Then you can try any of the techniques we mentioned and the great part is, it’s your art, so the result is up to you. You’ll quickly start learning what you like, what different effects you can get, and how to make a picture look just how you want it to. The practicing is fun and you get to melt away anxiety at the same time.
Make your coloring projects pop with my free adult coloring eBook and sign up for my email newsletter HERE
Disclaimer: The information provided by ColoringMasterpiece.com (“The Site”) is for general informational purposes only. All information on the Site is provided in good faith, however, we make no representation or warranty of any kind, express or implied, regarding the accuracy, adequacy, validity, reliability, availability, or completeness of any information on the Site. Under no circumstance shall we have any liability to you for any loss or damage of any kind incurred as a result of the use of the Site or Reliance on any information provided on the Site. Your use of the Site and your reliance on any information on the Site is solely at your own risk. This blog post is for educational purposes only and does not constitute legal advice. Please consult a legal expert to address your specific needs.
Terms and Conditions: https://coloringmasterpiece.com/terms-and-conditions/
