Adult coloring books are famous for their intricate designs and small details. Markers create beautiful, vivid colors, but they can also leave your artwork full of unwanted lines, and extra dots and sometimes even make your paper bunch or puckered. How does one color evenly with markers, especially when coloring such small and complex images?
Essentially you want to pick up your hand and move it back to your starting point to achieve those small, fluid lines. It also helps to start with your lightest colors, like yellow or pink, and move towards the darker, more domineering ones, like black and brown.
Preventing Bleed Through

When using markers or fountain pens, you may notice some undesirable dots where your marker first contacts the paper and again where you pick it up. Sharpies, both thick and thin, are incredibly guilty of these contact dots, or saturation points. This results from the lag in time between when your marker contacts the paper, and when you start drawing the line. Essentially, your paper absorbs the marker ink and creates a little pool as a result. The thin pages of adult coloring books tend to be particularly susceptible to these saturation points.
Keeping the pressure light and lots of space between your hand and the paper will minimize such dots. Remember, it doesn’t take a heavy touch to color with markers – light and gentle are vital to even, fluid lines without saturation points. Don’t be afraid to leave some white in your paper.
How to Avoid Lines
Like saturation points, while coloring with thicker markers, you may notice lines in your marker strokes. Light, small strokes will help alleviate this effect and minimize your lines. You can also use a blender marker to smooth out the streaks in color. Blender markers are thick, colorless alcohol-based marker that helps artfully blur your lines as well as create shading effects.
Want to learn more techniques for coloring without streaks? Check out our article How to Color with Markers WITHOUT Streaks!
Types of Markers
Pay attention to the type of marker you are using. In addition to thickness, there are different types of marker tips, such as chisel or brush. Knowing the difference and correctly using your marker will keep your markers fresh and functioning for much longer.
Brush Tips vs. Chisel Tips
Brush tip markers are particularly useful, as they enable the artist to draw with thick or thin lines and are incredibly helpful for intricate detail work. However, because of their delicate brush tips, it’s essential to use an extra light touch to avoid fraying your tip – this style of marker is not meant to be pressed down hard. Again, lots of space and a light touch will help you, as too much pressure will cause the tip to lose its shape. A delicate touch, however, will allow you to get into small corners of your artwork.
For example, consider dry-erase markers you may have used on whiteboards in school. Think about the difference between using a fresh, new marker with a nice pointy brush tip versus one that’s frayed due to too many students writing with a heavy hand. The former, intact marker, is much more of a joy to use, while the latter is a drag to use and harder to read.
Like a calligraphy pen, chisel tips are useful for creating a variety of thick or thin lines, but again, care must be taken to uphold the integrity of your tip. Too much pressure will smash your tip down, causing you to lose the ability to make those thin, crisp lines. Be good with your markers, and they will be good for you and your artwork.
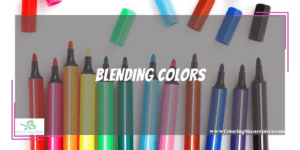
Blending Colors

When blending marker colors, starting with the lightest color in your palette is critical. You can layer more colors on top in descending order from lightest to darkest using small strokes. Try to use various thicknesses and styles when choosing your palette; don’t feel limited by one box or brand.
When layering colors, using a light touch is key to oversaturate your paper or cause it to pucker. Using small strokes and leaving lots of white space will allow you to mix in more colors with ease to create your unique effects.
Using a blender marker while layering colors will also help you get a nice, even look and help create some cool effects. Don’t be afraid to play with color! If you don’t have a blender marker, don’t fret. There are lots of ways to use the tools you do have at your disposal. For instance, Crayola brand markers tend to be wetter than other brands, making them useful for blending colors.
Fun with Magic Markers
While most of us may be most familiar with the thicker Crayola magic markers of childhood, the company has released various widths and tips. The Crayola Super Tip markers are incredibly helpful as their chiseled tip allows the artist to color using thick or thin lines. Even if you’re using the classic eight-pack, there’s no need to let that limit your creativity; with just a simple palette and basic knowledge of the color wheel, you can still employ all of the colors of the spectrum.
Techniques
Since Crayola markers are wetter than others (they are water-based, after all – it’s what makes clean-up “magic”), it is possible to mix colors to create your fun combinations, as you may already do using paint. Using a hard plastic or porcelain artist’s palette, choose your base color, and make a few strokes to get some ink in the cup. Repeat this step with another color. Use the flat edge of either marker to soak up the new color, like a paintbrush, and use your flat edge to apply to your paper.
If you’re working without a palette or want to create a cool gradient effect, you can also touch one marker tip to the other. Holding both markers vertically, one tip down and one tip up, lightly touch the tips to transfer the pigment from one marker to the other. The longer the tips touch, the more pronounced your effect will turn out. Just take care not to use too much pressure and damage the tip; the key to working with markers is truly a light and steady touch.
You can use water-based magic markers to create some very smooth and even marker art. Take a paintbrush, dip it in a small amount of water, and brush the water on the paper over your water. This blends the color beautifully and creates a nice, soft appearance. Try not to use too much water, so your paper doesn’t pucker too much. No paintbrush? Just dip your marker in a small amount of water before applying it to the paper to create a lovely pastel effect.
Ready to put these new skills to work? Click here to download my free adult coloring eBook and sign up for my email newsletter!
Disclaimer: The information provided by ColoringMasterpiece.com (“The Site”) is for general informational purposes only. All information on the Site is provided in good faith, however, we make no representation or warranty of any kind, express or implied, regarding the accuracy, adequacy, validity, reliability, availability, or completeness of any information on the Site. Under no circumstance shall we have any liability to you for any loss or damage of any kind incurred as a result of the use of the Site or Reliance on any information provided on the Site. Your use of the Site and your reliance on any information on the Site is solely at your own risk. This blog post is for educational purposes only and does not constitute legal advice. Please consult a legal expert to address your specific needs.
Terms and Conditions: https://coloringmasterpiece.com/terms-and-conditions/
