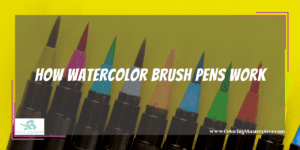
Many artists experimenting with watercolors eventually come across something called a watercolor brush pen. What exactly are these, and how do they work?
Watercolor brush pens work by releasing water-based ink through an attached brush onto the paper or canvas. They can be used with or without water to create watercolor art and are more portable and convenient than traditional watercolor paints. Watercolor brush pens are versatile tools that you can use to create watercolor art with no mess.
How Watercolor Brush Pens Work

Watercolor brush pens usually come in a set and can be used alone or with the water brush pen that sometimes comes with the set. It’s easy to get the two confused, so below are the basics of the watercolor brush pens themselves, as well as the optional water brush pen.
Watercolor Brush Pens
Watercolor brush pens look like regular pens, but instead of a tip (or nib) made out of a solid piece, there is a brush. The pens are filled with highly pigmented water-based ink, which can be used alone or with water. To use a watercolor brush pen, apply pressure with the brush onto a piece of paper or canvas. Use more pressure for thick lines and less pressure for thin lines. Waterbrush pens look like clear watercolor brush pens. They’re usually sold empty and can be filled with water to use along with watercolor brush pens or with traditional watercolor paints. The purpose of these pens is to help with blending, color washing, and other effects.
Note that although water brush pens are used for the same purpose as blender pens, blender pens aren’t the same. They’re used only with alcohol-based inks, never watercolors. Water brush pens are convenient tools, especially if you’re painting on the go. However, it’s perfectly acceptable to use a small container of water and a clean paintbrush instead, if that’s what you have available. Either way, make sure that the tool you’re using for blending is clean, or you might end up blending colors that you didn’t intend.
Watercolor Brush Pen Techniques
Watercolor brush pens can be used in much the same way that traditional watercolor paints, as well as markers, can be. The more you experiment, the more you’ll find your style and preferred way of using the pens. To help you get started, here are some technique ideas.
Angles
As mentioned earlier, watercolor brush pens can create very fine lines if little pressure is applied to the paper, very thick lines if more pressure is applied, and anywhere in between. The angle at which the pen is held to the paper can also change the effect a pen has, much in the same way as with a paintbrush. The more of an angle you use, the broader the stroke you’re painting will be, and the more upright the pen, the thinner the stroke. Usually, it’s best to hold the pens between a 30 and 45-degree angle from the paper, but you may prefer more or less, depending on your painting style and what you’re trying to do on a particular piece of work.
Blending
Blending refers to combining two different colors and is usually done gradually so that it looks like the colors are fading into one another. There are a few ways of achieving this, but the simplest is to paint a line or shape of one color, leave a space, and paint a line or shape of the other color. Then use the water brush to pull the two colors into each other. The larger the space between the two colors, the more gradual the fading effect will be. You can also use this technique with two similar colors, like forest green and yellow-green.
Shading
Shading creates depth in a painting and can be easily achieved with watercolor brush pens. Just dilute a color before using it, and fill in the entire shape with the light color. Then go back over parts of the shape (wherever you’re creating the illusion of shadow) using the same color, but without diluting it this time. Because it’s undiluted, it’ll just be a darker version of the original color. This is an easy trick for realistic shading. You can wait for the first layer to dry when doing this or paint right over the top of it while it’s still wet, depending on the look you’re going for.
Wet on Wet
Wet-on-wet painting involves wetting both the paper and pen before painting. It will result in less defined shapes since the water will cause the paint to move around the paper quite a bit. This technique is useful for larger-scale works, backgrounds, and layers that don’t require many details. Remember, you can always go back and add more detail later, once the paint has dried.
When it comes to painting with watercolors, there are four possible paint-to-surface combinations. From least precise to most are:
-
-
-
- Wet on wet
- Wet on dry
- Dry on wet
- Dry on dry
-
-
Experiment a bit with each combination until you feel you like it best and incorporate it into your work best. Some watercolor artists use the dry-on-dry technique but go back over it with water to reactivate and blend the paint later.
Color Washes
Color washes are foundational to painting with watercolors, whether you’re using brush pens or traditional paint. They’re essentially very watered down pigment that appears translucent and is used in many layering techniques. Color washes can be used anywhere in a painting but are often used to fill in large areas like backgrounds.
According to Little Coffee Fox, there are four main types of color washes:
-
-
-
- Full
- Gradient
- Variegated
- Wet-on-wet
-
-
Each wash produces a different effect, from uniform to faded to textured.
Building Up Color
As you might have guessed, building up color is the same as gradients or fades, but in reverse. When you build up color, you work from no pigment, gradually adding color until it’s completely opaque. To build up color with watercolor brush pens, use your water pen to draw a line. For the sake of this instruction, let’s say the line is going from left to right. About midway into the line, dab your watercolor brush pen into the line of water. Come back with your water pen and start to drag it, still left to right, through the pigment left by the pen.
You should now have a very faint line of color. Now, dab the color onto the end of that faint line, and again drag the water pen through it. This segment of the line should be slightly darker than the previous one. Continue the process, slowly building up the color in each segment until you achieve full color.
Masking Tape
Try placing masking tape (rubber cement works too) on the paper or canvas in places and painting over it. Once the paint is dry, remove the tape (or cement), and the paper underneath will remain white. Be sure to use thick, strong paper for this or risk tearing or peeling the paper.
Texturing Effects
Many watercolor artists enjoy experimenting with additional tools they can use to create exciting effects in their paintings.
A few common ones are:
-
-
-
- Salt
- Rubbing alcohol
- Saran wrap
-
-
Dabbing rubbing alcohol into wet watercolor ink will create an interesting swirling pattern, similar to tie dye. Pouring salt onto a wet painting and then scraping it off (carefully) once the paint is dry will create a dotted texture that can be great for underwater scenes or mimic stars in the night sky. Crumpling saran wrap and pressing it onto a very wet painting will leave the wrap’s indentations, providing interesting random texture. Bubble wrap works for this as well, if a more uniform result is desired.
Letter Art
Because they’re so flexible, watercolor brush pens are perfect for letter art or modern calligraphy. They can be used in much the way that traditional calligraphy artists use brushes, with varying thickness lines resulting in increased or decreased pressure and angle.
Final Thoughts

Watercolor brush pens are the best of both worlds, perfect for marker artists who want to dabble in watercolors or watercolor artists who want a more convenient and portable option than traditional watercolor paint sets. Use them with or without water to create unique watercolor effects with virtually no cleanup time. Just put the lids back on, and you’re done!
Want to know what you can do with your artwork after? Check out our article here!
Can’t get enough? Click here to download my free adult coloring eBook and sign up for my email newsletter!
Disclaimer: The information provided by ColoringMasterpiece.com (“The Site”) is for general informational purposes only. All information on the Site is provided in good faith, however, we make no representation or warranty of any kind, express or implied, regarding the accuracy, adequacy, validity, reliability, availability, or completeness of any information on the Site. Under no circumstance shall we have any liability to you for any loss or damage of any kind incurred as a result of the use of the Site or Reliance on any information provided on the Site. Your use of the Site and your reliance on any information on the Site is solely at your own risk. This blog post is for educational purposes only and does not constitute legal advice. Please consult a legal expert to address your specific needs.
Terms and Conditions: https://coloringmasterpiece.com/terms-and-conditions/

