When you discover there is more to coloring than just dragging a colored pencil across the page, a world of creativity opens up before your eyes. A patient artist who takes the time to practice proper technique will gain the valuable skill of creating light and shadow. This mastery of form and style leads to bolder colors and increasingly vivid image creations.
Learning how to make these five marking techniques correctly will give your subject a defined form and turn an otherwise flat drawing into a three-dimensional masterpiece. By understanding the importance of color value and depth, you will be able to recreate life-like images of photographic quality with colored pencils.
Stippling

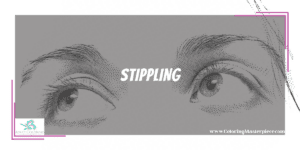
The first technique uses dots to create areas of light and shadow based on the placement of the dots on the page. To make an area appear dark, use a large number of dots near each other. If you want to create a movement of dark to light progressively, use fewer dots spread apart at farther distances.
Most often used with pen and ink, stippling works best with a fine point so keep your pencil sharpener handy and use colored pencils that have a strong core. This versatile technique gives the artist the ability to imply an object’s shape, imitate its texture, and create light and shadow on the page.
Stippling involves creating a visual balance of positive and negative space on the paper. The object you are drawing is represented by the positive space. The negative space, therefore, is the space in and around the object you are drawing.
Effects of Stippling
How much negative space remains on the page plays several roles that affect the look and realism of the drawing.
Brightness – When placing the dots upon the crisp white paper, each dot diminishes the color value of the page’s surface. In other words, it reduces the brightness of that spot on the paper. What that means is the more dots you put in a concentrated area, the darker that area will appear. To create areas of light, you use fewer dots spaced out on the page resulting in more negative space and hence a brighter area.
Texture and Distance – The placement of stippling dots to take advantage of light and shadow also plays a role in creating the look of texture and the illusion of distance. In the case of creating texture, the more shadowing you create, the more textured the surface of the object will appear.
When it comes to simulating distance in a drawing, items that need to appear in the foreground or closer should be highly detailed using lots of shadowing and little light space. Conversely, objects that are farther away require less definition by using more negative space than positive space.
A color blending technique that uses the stippling method of applying dots of varying quantity and density is known as pointillism. Often used with paint, this technique imitates blended colors to create an image. This method uses two or more different colors to replicate the lights and darks of objects in natural light.
Hatching and Cross Hatching
The colored pencil marking techniques of hatching and cross-hatching use lines to recreate an object’s texture and imitate shadow and light. A few artists will use either hatching or cross-hatching to maintain a uniform look. Most artists, however, will use both techniques together.
The primary purpose of using hatching and cross-hatching with colored pencils is to produce a complete spectrum of color values. This value range is what gives the object a three-dimensional form through the imitation of a source of light.
When using the techniques of hatching and cross-hatching with colored pencils, the amount of pressure you apply to the pencil will affect the color values. Colored pencils also make it easier to finesse both the textures and widths of the lines drawn.
Effects of Hatching and Cross-Hatching
The techniques of hatching and cross-hatching are especially useful when recreating three-dimensional objects by creating the cross-contour lines of the figure. Hatching and cross-hatching provide an artist with the ability to create breathtaking works of art even without the use of bold color through understanding the importance of color value.
Just as we learned with stippling dots, placement of the hatch and cross-hatch lines, both in density and distance apart, creates the positive and negative space of and around the object. This, like before, makes use of the color value and simulates the light and shadow of the subject we are putting on paper.
These multiple color values of dark and light, when placed precisely on the page, will develop into more realistic images that pop off the page rather than lie flat on the paper. The length, width, and value of the lines give an endless array of patterns to create unique textures or recreate ones found in nature.
Back & Forth and Scumbling

The biggest differences between the previous colored pencil techniques and the marking methods of back and forth and scumbling are:
1, How you hold the pencil in your grasp
2. Amount of contact the pencil makes with the page
How You Hold the Pencil
How you hold onto your colored pencil will affect the way the colors look on the page due to the amount of pressure you apply to the page. The grip you apply to the colored pencil when using the back-and-forth or scumbling method will have a more noticeable effect on your coloring endurance than those techniques that break up the pencil’s contact with the paper. It is important to hold the pencil with control with a relaxed grip to prevent your wrist from tiring out from the repetitive motions of back and forth and scumbling.
Amount of Contact with the Page
When you color large areas with the techniques that keep the pencil in constant contact with the paper, it requires frequent changes in direction. This directional adjustment will mask the pencil lines and create images that flow smoothly across the page. Changing the direction of the back-and-forth strokes or the circular direction of scumbling will give colors an even and consistent look.
Effects of Back & Forth and Scumbling
The tooth of the paper plays a much bigger role in colored pencil art when using the techniques of back and forth and scumbling. As the colored pencil moves across the page, the pigment core fractures into minuscule pieces and embeds into the infinitesimal ridges of the paper. These tiny ridges have a limit to how much color they can hold.
Keeping that in mind, it is imperative to use a light but steady pressure to apply colored pencils evenly. As you continue to work, you can add layers of color, a little bit at a time until you reach the desired hue. Once the tooth of the paper has reached its maximum capacity, it will make it harder to make adjustments to the boldness or shade of color you’ve obtained.
Essential Tools for Working with Colored Pencils
Professional-grade colored pencils and paper are the only way to get professional quality artistry. Buying cheaper pencils and paper will result in mediocre drawings and deny you the opportunity to fully experience and appreciate the medium of colored pencils. Take time to invest in yourself and get the right tools for the job that will provide complete satisfaction with your work.
Tools for Blending
While the five-colored pencil marking techniques use light and shadow to demonstrate gradient in monochromatic drawings, blending is used to smoothly transition from one color to another. This shift in hue can occur abruptly and harshly, or softly over a long distance on the page.
Solvents
These liquids are used to disintegrate the binding of the oil or wax-based colored pencils to eradicate the visibility of the pencil strokes. This method of blending smooths out the fragments of the colored pencil core making it easier to work in layers. The use of liquid solvents gives the artwork the fluid look usually seen with paints. Solvent blending is best suited for dark and medium shades of color but can be used on fairer chroma.
Colorless Pencil Blenders
These colored pencil-shaped tools have no pigment of their own and are used for the same reasons as liquid solvents. This method can be more time-consuming but the results are equal to solvent blending. Colorless pencil blenders are essential for layered work and the technique of burnishing.
Burnishing with a colorless pencil blender is great for smoothing out any uneven areas of color and reducing spots of saturation. This method is ideal for medium colors, is particularly effective in light hues, and is necessary to create highlighted areas.
White or Off-White Colored Pencil
A tool you should already have on hand if you bought a high-quality colored pencil set is a white or off-white colored pencil. Used in the same manner as the colorless pencil blender, this method is intended for creating a lightened hue while burnishing the picture.
This method is essential for recreating a hazy morning mountain scene, blending and irradiating skin tones, or alluding to a light source by highlighting areas of the image.
Learn all you need to know about color pencils and other coloring techniques with my free adult coloring eBook and sign up for my email newsletter HERE!
Disclaimer: The information provided by ColoringMasterpiece.com (“The Site”) is for general informational purposes only. All information on the Site is provided in good faith, however, we make no representation or warranty of any kind, express or implied, regarding the accuracy, adequacy, validity, reliability, availability, or completeness of any information on the Site. Under no circumstance shall we have any liability to you for any loss or damage of any kind incurred as a result of the use of the Site or Reliance on any information provided on the Site. Your use of the Site and your reliance on any information on the Site is solely at your own risk. This blog post is for educational purposes only and does not constitute legal advice. Please consult a legal expert to address your specific needs.
Terms and Conditions: https://coloringmasterpiece.com/terms-and-conditions/

