Before you begin to attempt to draw copperplate, it is a good idea to discover just what copperplate is, and what it means to write it. For example, there is a computer font known as Copperplate Gothic. Open it on your computer word processor and take a look at it. You will see that it seems to be all capital letters, and it is somewhat ornamented. But while it is style “copperplate”, and you could draw it, this is not the copperplate we wish to focus on today.
If you want to draw copperplate you will need a copy of a copperplate cursive alphabet book, a child’s cursive writing practice book, a smooth-surfaced art paper, a sharp pencil, a ruler, a set of pens or markers, and time for practice. You might also want a book of short sayings or poems. Haiku is perfect for copperplate writing practice.
Why you need a book to learn copperplate drawing/writing

So, what exactly is copperplate, and why do you need a book to practice writing/drawing it? Typerie.com provides a lovely explanation of what copperplate is and why you need a book. (http://typerie.com/home/2016/8/6/the-history-of-copperplate-calligraphy) Just incidentally, this page also has a lovely example of the copperplate alphabet.
A child’s practice tablet for writing in cursive will get you most of the way toward writing in copperplate. A book that focuses on copperplate writing will provide fancier capital letters and some specialized lowercase letters, as well as directions for writing copperplate with a steel nibbed pen.
Copperplate was the material used to make early impressions for printing just about anything. It was soft, and that made it easy to carve into with a steel engraving pen or similar engraving instrument to make a printer’s block that could be inked and used to print a page in a book. The style of writing used to make these early printing blocks became known as copperplate.
There is also a style of writing called “Spencerian” which is even more ornamented than Copperplate. You might find it mentioned in Georgette Heyer’s Regency Romances, as in “her hand(writing) was so ornamented as to be illegible.”
Copperplate writing became fashionable in Europe, and some companies recognized a good market when they saw one and began putting out practice books. You will want one, too, if you plan to draw/write in copperplate very often. The practice books will not only show you the shape of the letters, but they will also show you how to connect them to make words.
The Ruler
If you are going to write in copperplate, then you can get by with a sheet of lined notebook paper, although you will probably do better with a child’s printing practice book in the beginning. But if you want to draw copperplate writing for gift cards or framed messages, then you will want to write on art paper, which is usually unlined. Before you begin drawing letters you will need to make pencil lines on your paper. You will use these lines to keep your letters in a straight row so they do not stagger all over the page.
Measure down one inch from the top of your drawing paper. Then use a ruler to measure and draw neat, three straight lines that are ½ inch apart, then measure down ¼ inch, and draw another line, then draw another set of three lines that are ½ inch apart. Repeat as often as necessary to make room for your message or until you come to the bottom of the page.
Learn more about calligraphy HERE.
The Paper
The paper for decorative writing needs to be smooth, with almost no teeth. This is so that if you use traditional writing pens the ink will not wick into the fibers of the paper. This is likewise true if you decide to cut corners on both cost and difficulty and use fine tip/brush marking pens. You can also purchase felt tip pens that are made specifically for calligraphy.
The Pencil
If you are drawing copperplate or practicing writing in copperplate cursive, an ordinary, well-sharpened, number-two pencil will be your best friend. You will use it to draw your guidelines, then you can also use it to lightly trace the outline of your letters before you draw them in ink.
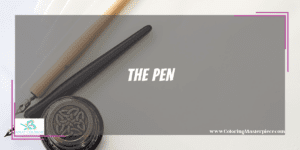
The Pen

Copperplate came into style not long after the invention of the steel nibbed dip pen. The steel nib of the pen allowed the user to make wide lines and thin lines. If you can afford a set of calligraphy pens, it is truly the best way to re-create copperplate writing.
Thanks to the nature of steel pen nibs, it is not possible to make a bottom-to-top stroke. You must draw with the pen using a sideways motion or a down stroke. The sideways motion results in a thin line. The downstroke creates a thick line. Thin and thick lines are part of the characteristics of copperplate writing.
Another characteristic is that the capital letters are not always connected to the lower-case letters, but in the lower case all letters within a word are connected with thin, sideways lines that sometimes travel from the baseline to the middle of the writing space. Therefore to form a round letter, such as “a”, you would take your pen to the top of the letter forming the left-hand part of the letter, then travel back along the first line to the baseline, then using a thin stroke to make a straight line that would go up the back of the letter, meet at the top, then be pulled back to the baseline to make the curled tail that would attach to the next letter.
This sounds very complicated written out this way, but it is almost intuitive when you are using a steel-nibbed pen to write in any cursive writing style. However, this is also the reason why it is a good idea to work in a child’s practice book for cursive writing first, then use a book specifically about copperplate as your instruction manual for writing copperplate. After a first try or two, you can quickly see why penmanship can be considered an art form.
A good set of drawing/writing steel nibbed calligraphy pens begins at around $22.00, USD. The good news is that they will not dry out, are unlikely to break, and if properly cared for, can last a lifetime. You will need to clean your pens after each use and purchase ink from time to time.
For a one-off project, you can get by using fine-liner brush pens. First pencil in your words, being as careful as you can to follow the forms and draw the thick line parts. (This is a good idea when using pens, too.) Then go over the words with the fine-line end of the marker. Next, go back and use the brush end to fill in the thickest parts of the letters. Finally, revert to the thin line end of the marker, and carefully blend the thick and thin parts so that they look as if they were drawn with a pen.
Copperplate writing is not as ornate as some other lettering styles, but it can look lovely when incorporated with a message, or it can even be used as a signature. Despite the current style of signing forms or checks with a massively illegible scrawl, copperplate can be distinctive and amazingly difficult to copy.
Most of all, cursive writing of all sorts has fallen out of fashion. Like hand sewing, knitting, embroidery, and similar arts, it needs to be practiced by someone, just so we do not lose the skill. After all, have you written anything in cuneiform lately?
Ready to learn more? Download my free adult coloring eBook and sign up for my email newsletter HERE!
Disclaimer: The information provided by ColoringMasterpiece.com (“The Site”) is for general informational purposes only. All information on the Site is provided in good faith, however, we make no representation or warranty of any kind, express or implied, regarding the accuracy, adequacy, validity, reliability, availability, or completeness of any information on the Site. Under no circumstance shall we have any liability to you for any loss or damage of any kind incurred as a result of the use of the Site or Reliance on any information provided on the Site. Your use of the Site and your reliance on any information on the Site is solely at your own risk. This blog post is for educational purposes only and does not constitute legal advice. Please consult a legal expert to address your specific needs.
Terms and Conditions: https://coloringmasterpiece.com/terms-and-conditions/
