Combining the unpredictability of watercolor with the precision of calligraphy might seem impossible, but it can be done pretty quickly using watercolor brush pens.
To do calligraphy with watercolor brush pens, choose a thick paper or cardstock to work on. Use the watercolor brush pens at an angle to create both thick and thin lines, and practice until your lettering is consistent and even. The more you know about the elements that go into good watercolor calligraphy, the easier it will be for you to master the skill.
The Pens
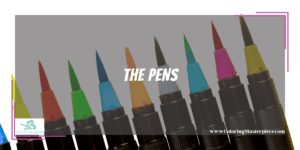
The first element in calligraphy done in watercolor brush pens is, of course, the pens. Watercolor brush pens are pens with brush-like tips that are filled with water and pigment-based ink. They offer the flexibility and experimentation that watercolors are known for, with none of the hassles. Their convenience is a huge part of why they’re so famous for calligraphy and other art styles.
Watercolor brush pens can be used alone or with a small cup of water or a water pen (a brush pen filled with clear water). Changing the amount of water will increase or decrease the brightness of the pens’ colors and allow for blending between different shades. Watercolor brush pens come in black if you want to do traditional-looking calligraphy, as well as an assortment of colors. They even come in metallic shades, which look amazing against a dark background.
The Paper
Although arguably not as important as the pens themselves, the paper you choose to do watercolor calligraphy is also essential. You can use any paper while you’re practicing, of course, even a computer or notebook paper. When practicing calligraphy and hand lettering, many artists find it helpful to use paper with dots or lines forming a grid to help them get the proportions of the letters right while getting the hang of it. We’ll talk more about that in the next section. If you want to save for work, using cardstock or a thick watercolor paper that won’t buckle when wet is recommended. When choosing paper for your watercolor art, remember to factor in the amount of water you’ll use and what that does to paper as far as wrinkling and tearing.
Many watercolor artists prefer smooth paper for watercolor, but there’s nothing wrong with using more textured paper if the look appeals to you. Keep in mind, though, that if the paper is heavily textured and you use a lot of water in the piece, you’ll need to look out for water pooling in between the ridges. As with everything relating to art, of course, you have to find what works best for your personal preferences, as well as your vision for the piece of artwork.
To learn more about watercolor paper, check out our article here!
The Calligraphy
Calligraphy is an art that’s about 2,000 years old, and it’s not possible to teach everything about it in this post. If you’re already familiar with calligraphy, you might want to skip ahead to the section ‘putting it all together’ (although a refresher never hurt anyone). If the art of calligraphy is new to you, here are some basics to get you started.
First of all, it should be pointed out that most watercolorists who do calligraphy do what is called “modern” or “faux” calligraphy, which is what we’ll be talking about. Traditional calligraphy is a particular style, accomplished with a dip pen and specific nibs depending on the style. Modern calligraphy better lends itself to the experimental, variable qualities that we love so much in watercolor art. Hand lettering, while similar to modern calligraphy, is more freestyle. It’s considered to be a letter illustration and doesn’t have to follow the consistency of modern or traditional calligraphy.
All that being said, here are the basics.
Pick a Style
Although you won’t want to be tied to one style forever, it’s helpful to choose a specific font or font family to initially practice with. Font styles range from traditional to modern, simple to extravagant, print to cursive. No matter what your style, you’re sure to find a font that speaks to you.
Practice Consistency
As mentioned above, it’s useful to practice on a graph or dotted paper when you’re just starting to make sure you get the hang of the letter proportions. Once you become more confident, you can graduate to lined paper with a dotted line in the middle, like school children use when learning to write. Or, throw caution to the wind and head straight to unlined paper.
Some things you’ll want to look out for in letter quality are:
-
-
-
- Consistent letter sizes
- Consistent widths
- Are parallel lines perfectly parallel?
- Letter spacing
-
-
The Thick and Thin of It
Although every style has its differences, a general rule of thumb regarding calligraphy is that you’ll want to use thick lines when making a downward stroke and thin lines when making strokes upward. Practice making thick lines, and thin lines, and transitioning between the two.
Angles
Don’t forget to take a look at how your letters sit on the page. Are they straight up and down, or do they lean a little to the left or right? If they do lean, is it intentional? Do they all lean at the same angle? There’s no right or wrong answer to any of these questions; they’re to get you thinking about all aspects of the letters you’re creating. There’s nothing wrong with experimenting to find something you like, and then practicing that until you’ve nailed it.
Be Patient
It’s normal to be excited and want to start creating, but remember, the better you’re able to master the techniques needed for quality calligraphy, the more successful and fun your future experiments will be. Even once you decide you’re ready to start using your calligraphy skills, always make time for practice, so you’re always improving.
Putting It All Together

It would help if you had a pretty good idea of the basics by now:
-
-
- Watercolor paper
- Watercolor brush pens
- Modern calligraphy basics
-
So let’s put them all together so you can get started making unique watercolor calligraphy.
Holding the Pens
Especially if you’ve been an artist for a while, it can seem pretty silly for someone to point out how to hold a pen. But watercolor brush pens behave differently from pens or brushes, and calligraphy has specific needs for how a brush is held. Usually, it’s best to hold watercolor brush pens between a 20° and 45° angle to the page. Too much and the bristles can interfere with your work; too little and you lack as much control as you need.
Practice until you find the angle that allows you to control not only the pen’s movement across the page but the thickness or thinness of the lines as well. It’s also worth noting that you’ll have more control and consistency in calligraphy if you move your hand and wrist very little and use your shoulder more. Your hand should be lightly resting on the page or hovering slightly above it.
Using Water With One Color
If you’ve used watercolor at all before, then you know how much difference adding water can make. The more water added, the lighter and more transparent the color. The less water, the stronger the color. Experiment with creating only the letters’ outlines, or only the tops or bottoms, then using a water brush to pull the colors to complete or fill in the letters. This will create a cool faded effect. Going over parts of lighter letters with a less diluted pigment can create shadows and depth. Or you can use more or less water on only specific letters or words. Using a lot of water on all but one word will make that one word stand out as though it were bolded.
Water With Multiple Colors
You can use water to blend multiple colors within the same word or even the same letter. An easy way to do this is by using different colors and leaving a gap between them, then using the water pen to pull the colors from either side into the middle of the white space, connecting them. There are also plastic mixing palettes available if you want to blend multiple colors to create a new consistent shade. Using a darker shade or even a completely different color to highlight your letters’ aspects can make the letters pop.
Frequently Asked Questions
What is the difference between a waterbrush pen and a watercolor brush pen?
Waterbrush pens are used to blend the watercolors laid down by watercolor brush pens on the page. Water brush pens contain only water, no pigment.
Do I need a water brush pen to use with my watercolor brush pens?
You don’t have to use a water brush pen with your watercolor brush pens, but it is more convenient and controllable than just dipping the pens in water.
Can’t get enough? Click here to download my free adult coloring eBook and sign up for my email newsletter!
Disclaimer: The information provided by ColoringMasterpiece.com (“The Site”) is for general informational purposes only. All information on the Site is provided in good faith, however, we make no representation or warranty of any kind, express or implied, regarding the accuracy, adequacy, validity, reliability, availability, or completeness of any information on the Site. Under no circumstance shall we have any liability to you for any loss or damage of any kind incurred as a result of the use of the Site or Reliance on any information provided on the Site. Your use of the Site and your reliance on any information on the Site is solely at your own risk. This blog post is for educational purposes only and does not constitute legal advice. Please consult a legal expert to address your specific needs.
Terms and Conditions: https://coloringmasterpiece.com/terms-and-conditions/
