How to color with Prismacolor pencils is not very different from how to color with any other brand of wax-based colored pencil because every colored pencil consists of a core of coloring medium encased in a barrel or tube that protects it.
Sort your pencils by color or type before you begin to color
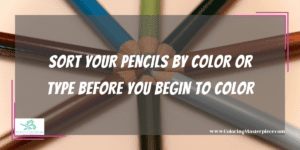
This will help you to be consistent with your color application, especially if you note the names of colors as you work or tag the pencils with a bit of tape.
Always apply the color gently without pressing down hard on the pencil or gouging the point into the page
Colored pencils work better if you layer the applications of color rather than pressing hard for a darker color result.
Outlining a shape can help your eye find the edges of an area, but it is not always necessary.
- Outline helps you see the precise edges of an area
- It can define an area for blending
- But it can interfere with realistic presentations of objects, including the ability to shade and blend
- In real life, no objects have dark lines around the edges, therefore use outlining with caution.
Flat Color application, point style
- Move the point of the pencil lightly over a section of your picture while holding the pencil the same way you would hold it to write words. You can influence the appearance of your work through the direction of your pencil strokes. Pencil strokes that go in the same direction encourage the viewer’s eye to follow the direction of the strokes.
- For example, if you are coloring a sky, you will want the color strokes to be horizontal.
- But if you are coloring a door, you might want the strokes to be vertical. Even if there are sections of the door, you want to keep the coloring strokes all moving in the same direction.
- When coloring a circular object, such as a doorknob, you will want to use a swirling or circular motion. The doorknob is small, so you will not have to overlap the lines very often.
- You can make a section of a monochrome (one color) object stand out by using a slightly different shade of your first color and by coloring in a different direction.
Flat color application, core side style
- Place your index finger along the barrel of the pencil, using the end of it to brace the point. Move the pencil and your finger back and forth across the page (this usually works best for a horizontal stroke) as if you were using your finger to rub fog off a mirror. This places the side of the color core on the page and produces a smoother application of color.
- You can also make a graduated application of color that is darker than an ordinary pencil tip application without worrying that you might break the color core. Do this simply by tilting the pencil to press a little more heavily on the point while still maintaining the side application.
Swirling lines over a large surface
Swirling lines can be used to show motion, create clouds, or indicate that hair is curly. They can be applied in point style or side core style. The swirls can be small or large. They can cover the page densely or they can leave spaces of white between the marks.
Contour Lines
Contour lines are sketched lines that follow the shape of an object. They can create the illusion of depth or three-dimensional shapes even though the page you are coloring on is flat.
Hatching and Cross Hatching
- Hatching is the use of parallel lines to show shape or shadow. It is similar to contour lines; in fact, it can be contour lines. But it is more precise in the way the lines are placed.
- Cross-hatching is where hatching is crossed with a line running in the opposite direction, creating a sort of checkerboard pattern. It can be used with cross-hatching to make a denser shadow or to allow colors to mix visually rather than in fact. It can even be used to mix color in fact by using a blending pencil or other blending medium to mix the colors on the page.
Pencil Sharpening
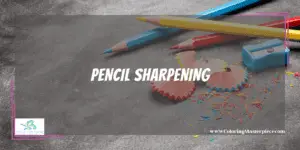
- Hatching and cross-hatching require a fine point on your pencil. Colored pencils do not fair well in grinder-type pencil sharpeners or electric sharpeners because the softcore tends to break and jam them up. Instead, use a good hand sharpener or a craft knife to whittle away the wood and create a fine point.
- Recent critical reviews about the Prismacolor pencils manufactured in Mexico note that the color core is off-center within the barrel. You can counter this problem by carefully going over the thick part of the wooden barrel more than one time with the sharpener instead of continuously turning it, or by carefully paring it away with a craft knife.
- Be careful not to put too much pressure on the softcore when sharpening because this will cause it to break. Avoid jamming the pencil into the sharpener. Instead, gently shave off little bits of the wood at a time.
Mixing colors by layering
- This works exactly the way you think it might. You color one color over the top of another. It is a good idea to start with your lightest color first, followed by a darker color, but you can do it the other way around for a different effect.
- Be wary of coloring in too many layers. Wax based colored pencils are subject to a problem called wax bloom. This is where the wax pulls to the surface of the picture creating a white film over it. Thick layers of color increase the risk of wax bloom.
Stippling or Pointillism
Call it what you will, this is the technique of making dots on your page to create contours or to allow the eye to visually mix color. You can make your dots all one color, or you can use several colors, but when working with pencils always place the point of your pencil on the page and gently twist. This will make a brighter dot than pecking on the page with the pencil core and will prevent breaking the point. It will also avoid annoying people around you who might object to noisy pecking sounds.
Working with Blending
Blending can be done in several ways. It can be used to create shading, achieve highlights, or create colors that are not included in your box set.
- Blending pencils help the soft, waxy colors of colored pencils blend more easily. A blending pencil can be used over two layered colors, pointillism, hatching, or cross-hatching. It can even be used to smooth a single-color application, especially where the paper might have a rough tooth.
- Blending oils, and even some household items can help with blending. Apply the blending medium with an eye dropper, a cotton-tipped applicator, a paper stomp, a twist of paper towel, or facial tissue.
- Paper stomps, tissues, and even paper towels can help with blending even without blending oil or other mediums. Stomps are excellent for small places because of their points while paper towels or tissues can be crumpled and rubbed over surfaces.
- Be aware of the quality of the medium surface. You can use colored pencils on a wide variety of materials in addition to paper or coloring books, including acrylic, cardboard, and wood. Different surfaces require different coloring techniques and can provide a lot of creative fun.
- Develop a location or a box for all your art supplies. Pencils, blending pencils, special erasers, and other materials can add up to quite an investment in the long run. Save yourself time, money, and frustration by having an art box or a shelf where you can find all your creative materials at once.
Learn more about Prisma colored pencils HERE.
Maximize the benefits of coloring with my free adult coloring eBook and sign up for my email newsletter HERE!
Disclaimer: The information provided by ColoringMasterpiece.com (“The Site”) is for general informational purposes only. All information on the Site is provided in good faith, however, we make no representation or warranty of any kind, express or implied, regarding the accuracy, adequacy, validity, reliability, availability, or completeness of any information on the Site. Under no circumstance shall we have any liability to you for any loss or damage of any kind incurred as a result of the use of the Site or Reliance on any information provided on the Site. Your use of the Site and your reliance on any information on the Site is solely at your own risk. This blog post is for educational purposes only and does not constitute legal advice. Please consult a legal expert to address your specific needs.
Terms and Conditions: https://coloringmasterpiece.com/terms-and-conditions/